As the house needs quite a bit of work still and we can’t afford to tackle it all at once, at the moment we’re trying to make the rooms we’re having to live with as they are look nice. Which means working with what we have. And unfortunately in some rooms there are things we need to keep in them that maybe aren’t the most attractive objects to have around and with the the make do rooms – it’s a challenge to make things look nice!
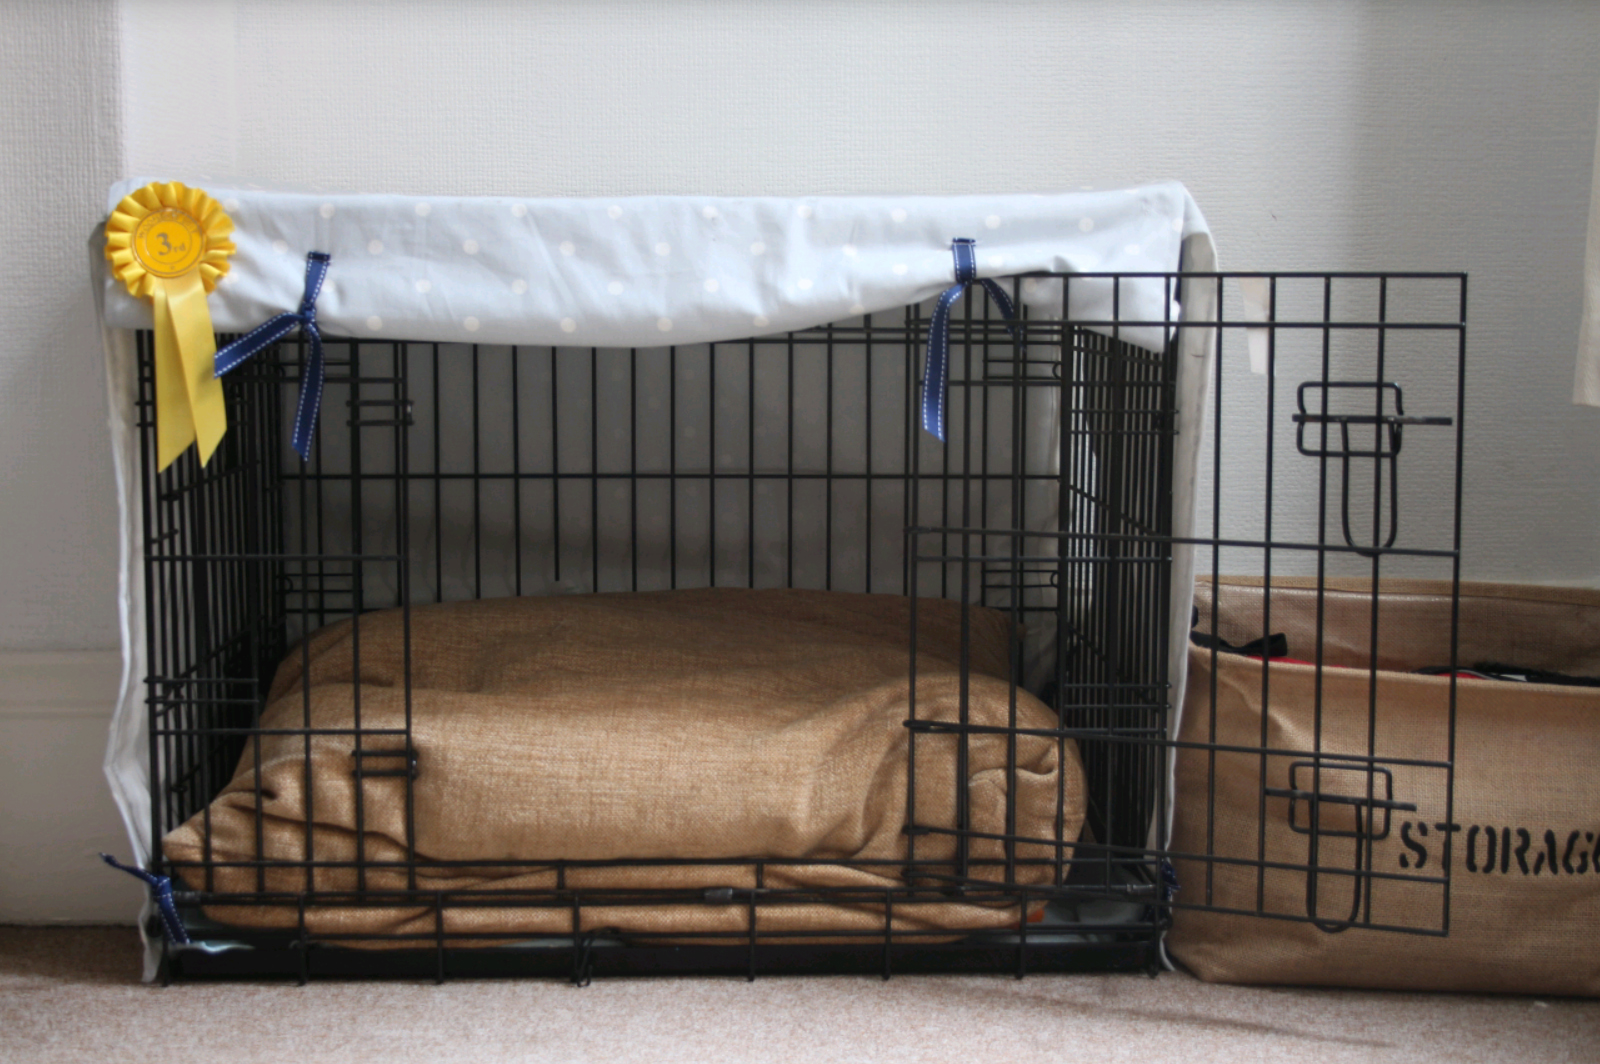
One of these is the dog crate*. It sits in the corner of the dining room and acts as Flash’s safe spot when he’s feeling like he needs a bit of space from everything, but crates aren’t very nice to look at are they, so I thought I’d try and make it a little prettier.
I had a look on Pinterest at ways to make crates less cumbersome and ugly and there are LOADS of ideas, but the one thing that came up over and over again were crate covers. Now these sell for quite a lot of money – and once you add shipping to the UK – far more than I wanted to pay, so I set about figuring out a way to make one. And luckily for me, it was really quite easy.
Now, this might not be the most technical diy post, but hopefully you can follow it. Just one note I’ll add – our crate has two doors to it and even though we rarely use one of them, I still wanted to make a cover that would allow for them both to be opened so the sides on our crate cover aren’t fixed together, but you could easily adapt yours so that the sides were permanently fixed together.
So, to if you want to make your own puppy crate cover like this one, here’s how;
What you’ll need;
- A tape measure,
- Sewing machine or some wonderweb and an iron (you can probably do this with minimal sewing)
- Enough fabric to cover your crate – I used spotty fabric from Clarke and Clarke.
- Some ribbons for ties.
 |
| 3rd? Only 3rd? My little fur face is cuter than 3rd place right! |
First off you’ll need to measure the crate. You’ll need to measure side 1, 2 and 3 as in the image below. Add on a couple of centimetres each side to them all to account for your hems.
My crate is side 1 = 58cm, side 2 = 76cm, side 3 = 52cm.
Once you’ve measured the crate you’ll need to measure out your fabric ready to cut it. Now this could be the tough bit to explain as I didn’t take photo’s but, you’ll need to measure out 2 big pieces of your fabric.
- The first piece will be measurement #3 wide, and the length of #1 (x2) and 2 added together – mine was 52cm wide and 192cm long (58 + 58 + 76), plus a couple of cm’s each side.
- The second piece will be measurement 2 wide and 1 (x2) and 3 long – mine was 76cm wide and 168cm long (58 + 58 + 52) again plus a couple of cm each side.
Once you’ve measured your fabric you’ll be left with 2 long pieces of fabric. Your next job will be to tidy up the edges. I double folded mine and sewed a hem all around the edge of the fabric. But if you don’t have a sewing machine then bust out the wonderweb and iron a hem on it
Once all your edges are sorted it’s time to piece it together. Lay your longer piece across the crate so that it touches the floor and covers the entire of the top and sides it is made for. Next put your other, wider, piece of fabric over the top of it and do the same.
Once I was happy that all the sides were covered I tacked a pin in each corner of the overlapping piece on the top of the crate to hold them together. I sewed little X’s where each of these pins sat so that the two pieces were joined together. I did this on the sewing machine but it could easily be done by hand as it’s so little sewing.
Next I sewed on small ties to the bottom of all the edges that would hang down over the crate sides. This is so I can tie the sides down and make sure they don’t shift about. I also sewed some of the same ribbon at the top where the main door is to keep it tidy when that side is rolled up – again, if you don’t have a sewing machine, this could be done by hand.
Then all that was left to do was pop it over the crate, tie the ties on and hope Flash liked it. Which I think he does. He can often be found in there with a chew or just having a nap so I think we’re onto a winner. It has made it look prettier for me, and cosier for him – next up I think I might try and make him a comfier cushion that fills the entire space, maybe a memory foam mattress with a cover to match……not that he’s spoilt or anything!
So, I hope this has made sense. If you have any questions, please just ask!
*before people start telling me we shouldn’t have Flash in a crate – he’s had it since we was a puppy, we bought it as a training aid and it is his safe place. The door is always open and he can come and go as he wants. I couldn’t shut him in it if I wanted to, as his face looks too heartbroken when I’ve tried if he’s been naughty in the past!


Buy CRATE COVERS at Wild Snug ⚡️ 10 Discount Code for NEW customers ✓ FREE SHIPPING on UK orders over £30 00 ✓ Stocked in the UK ✓ Beautiful Designs for your home and dog ✓ High quality dog cage covers, UK dog crate cover and cage covers, luxury, high quality materials Available in Small, Medium and Large Sizes
NICE BLOG