I’ve been after a big slouchy, black, leather handbag for quite some time but being a perpetual state of ‘I really can’t justify spending my petrol money on a handbag’ I just can’t afford any of the ones I want. But I live in a world where my ambition outweighs my skill 100:1 so I decided to go out and make one. How hard could it be? The original plan was to make one out of an old leather jacket I had, but when the jacket arrived back from the friends house it had been at for years it wasn’t quite big enough to make the pattern I wanted, so I went out and bought some pieces of super soft Italian lambs leather. {I still made a bag out of the jacket – just not as big a bag – I’ll share it another time!}
I spent a long time scouring Pinterest for shapes and ideas and came across this one that I loved. I didn’t take photo’s as I went {as per usual}, but here was the process;
- I cut myself a template from some baking paper. I fiddled about with the size a bit, because at the size mentioned, it seemed massive {it’s still massive btw!}
- I pinned the template to my lining fabric and cut it out. I went with this black and pink tartan that has been in my fabric stash for about 3 years!
- Once I had the lining cut and sorted, I cut another square of fabric to make a zip pocket out of. I used this tutorial to add the zipper, and sewed the pocket onto the ‘wrong’ wide of the lining fabric.
- Now i started to play with the leather. As it wasn’t cheap to buy, I went carefully and drew the shape of the bag out on the ‘wrong’ side in chalk. I wasn’t about to go all gung ho and cut right into it. Once the shaped were all cut out, I got out my pins and things got more complicated.

- I had bought a long, 2 way, centre closing zip to use as the closure. I knew that the zip wasn’t as long as the opening, and I wanted it to look nice and tidy so I decided to ‘close’ the ends of the zip. I’m not sure if that’s what it’s called, but I am sure you know what I mean. Here is the tutorial I used.
- Actually adding zips on bags with lining’s always baffle me and I have to follow a tutorial. I can get one of the sides right, but the second side always evades me – it’s all about getting the ‘right’ and ‘wrong’ sides of the fabric facing the right way. My brain can’t quite figure it out at all so this is my ‘go-to’ tutorial. Maybe one day it’ll come naturally, but that’s not happened yet!
- Once I had wrangled with the zip, and it was all sitting the right way round I started looking at closing up the bag. With the bag inside out, meaning the right sides of the leather were together, and the zip a little bit open in the middle, I sewed up around the bottom edge of the bag, right the way from the top.
- Next I did the same with the lining, but made sure I left a gap of a couple of inches in the lining, so I could turn the bag the right way round. I pulled the bag through the gap in the lining and it was starting to look like a bag!
- Adding the loops with the D-rings for the straps however was slightly more complicated than I thought. On the tutorial, as she’s using cotton, she doubles up the bow-tie shaped loops used to attached the strap. I tried this. It turns out even my wonder machine can’t sew though 6 layers of leather and two of cotton! So I had to go back to the drawing board. This time I used just one layer of bow-tie shaped leather, stitched on both sides. Sewing through 4 layers of copy and 2 layers of cotton still proved a little challenging and the stitching isn’t at all perfect. I think I’ll try and get some rivets to attach this as it’ll look better. I just need to find them first!
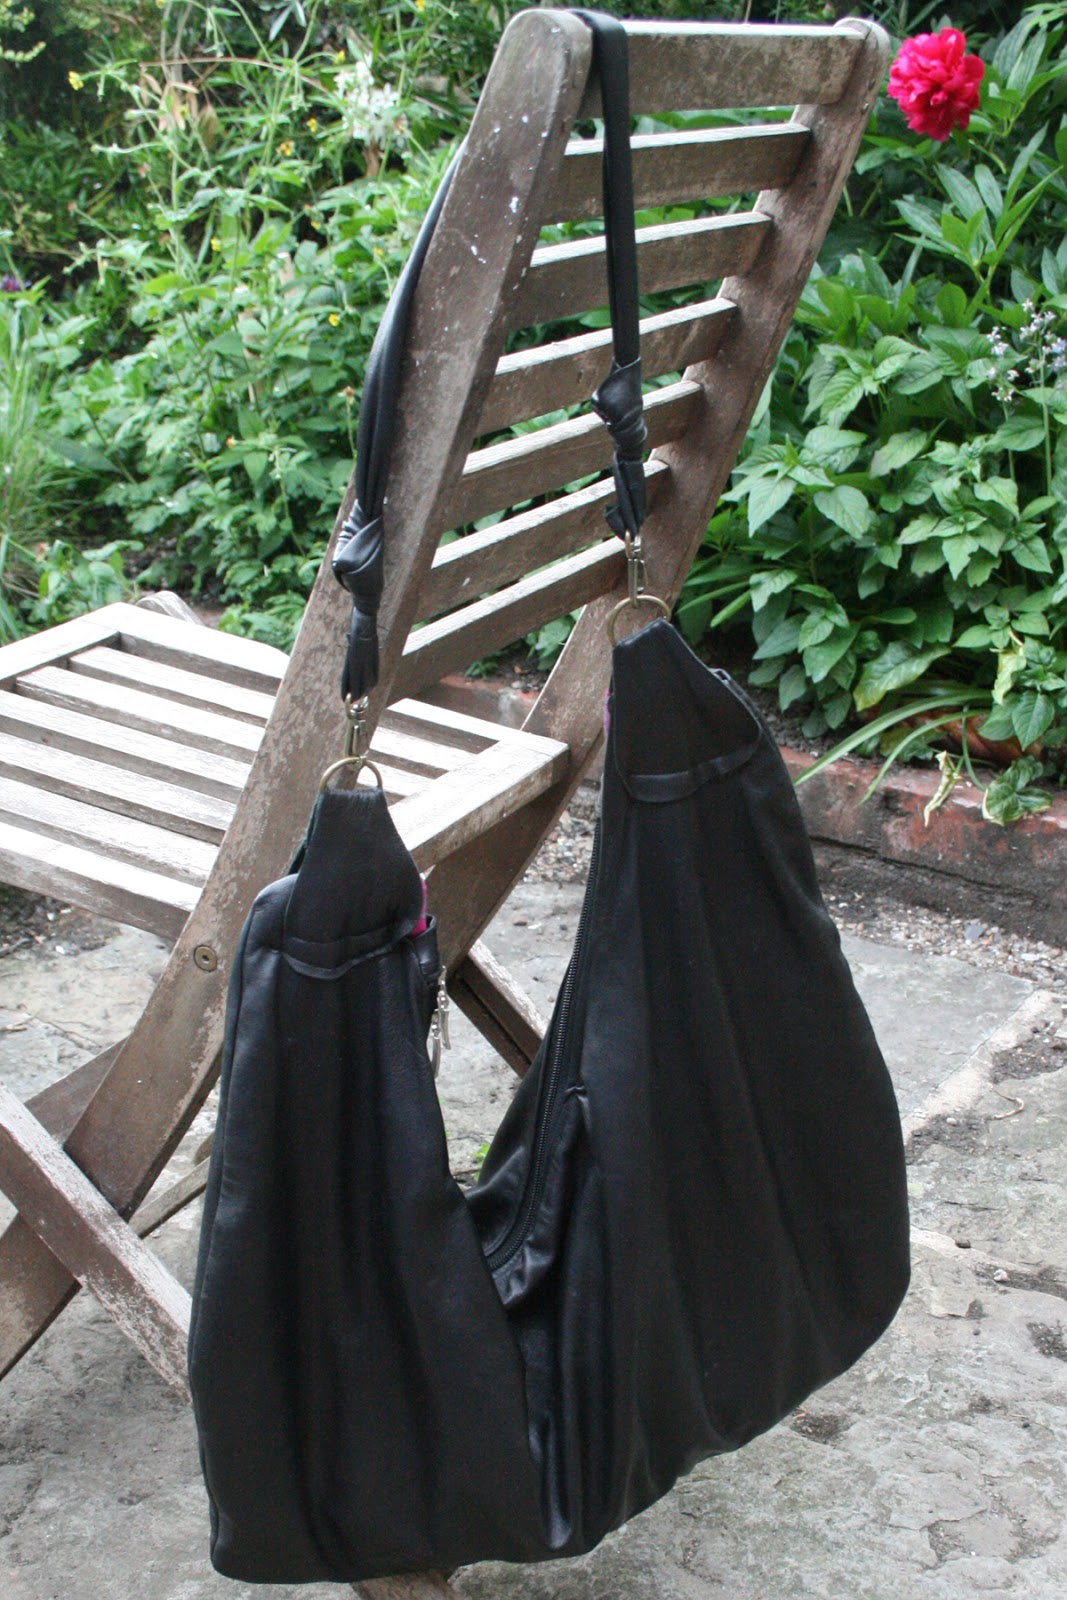
- I have two strap options for the bag – I have a long, cross body strap that I bought from U-handbag, and a shorter, shoulder strap. The shoulder strap is made from a long piece of leather, sewn together into a tube and turned right-side out. I attached the clips by looping them through the leather, sewing it back on it’s self and tying a know to cover the stitching {it looked a little raw and the strap was pretty long so this is a win win!}
- My last task was to top stitch around the zipper of the bag – which I’ll be honest should be simple as I was just top stitching from the ends of the zips, but it is a little wonky. Ooooops!


I think all in all it took me about 6 hours to make and about £45 worth of materials which I don’t think is bad for a super soft leather bag. When I am a little bit flusher, I might attempt to make the same sort of bag, only I’ll use a more distressed, slightly hardier leather and learn from my mistakes!
So there you go, a slouchy, black, leather bag that holds pretty much everything I could ever need. Not sure if you need a cardigan or a scarf, it’s ok, they’ll fit in the bag. Don’t want to leave the kindle at home, ah, there’s room. Need to smuggle sweets in the cinema, sorted. Can’t find your car keys? Just dig a little deeper, they’ll be there somewhere!
**Some amateur thoughts on working with leather – I hadn’t thought much about how slippery and stretchy the leather would be, no matter how many pins and bulldog clips I used I’ve still got area’s of puckering and gathering. And I use completely the wrong stitch length – everywhere. I thought the closer the stitch the more secure it would be, but on leather, it just works to perforate the material, and especially on the straps I have found it just makes it tear really easily.**
That's a really nice bag, and a good tutorial to match. Thanks for the thoughts on leather, it always struck me as a tricky material to work with and I think you've confirmed my suspicions! Still maybe I'll give it a go one day.
Love your bag! I've dabbled a bit in bag-making (from old leather jeans dontcha-know!) and I've bought all of my leather, rivets and fastenings from Le Prevo Leathers in Newcastle: leprevo.co.uk/ The folks there are super-helpful and their shop is like Aladdin's cave! I am lucky enough to live nearby, but they also do mail-order. It's definitely worth going to the shop if you happen to be in Newcastle though, as there are so many inspiring bits & bobs that aren't on the website.